Categories
flutter app Mobile app

Are You here to learn about beautiful Flutter apps?

Flutter is an open-source framework created by Google that allows developers to create complex user interfaces on multiple devices, regardless of whether it’s an Android or iOS operating system. With Flutter, you can build beautiful and feature-rich hybrid apps using a single codebase. Here are some aspects of Flutter that contribute to its appeal.

Hot Reload

Flutter’s “hot-reload” function enables developers to introduce changes almost in real-time, making the development process efficient.

Material Design

Google’s Material Design allows developers to modify every pixel on the screen using “widgets,” ensuring consistent UI designs across platforms.

Dart Programming Language.

Flutter apps are programmed using Dart, an open-source, object-oriented language developed by Google. Dart can compile both Ahead-of-Time (AOT) and Just-In-Time (JIT), making it easy to develop and maintain code.

Performance.

Fans of cross-platform mobile app development appreciate Flutter for its amazing performance, logical architecture, and thorough documentation.

Now, let’s explore some beautiful Flutter apps.

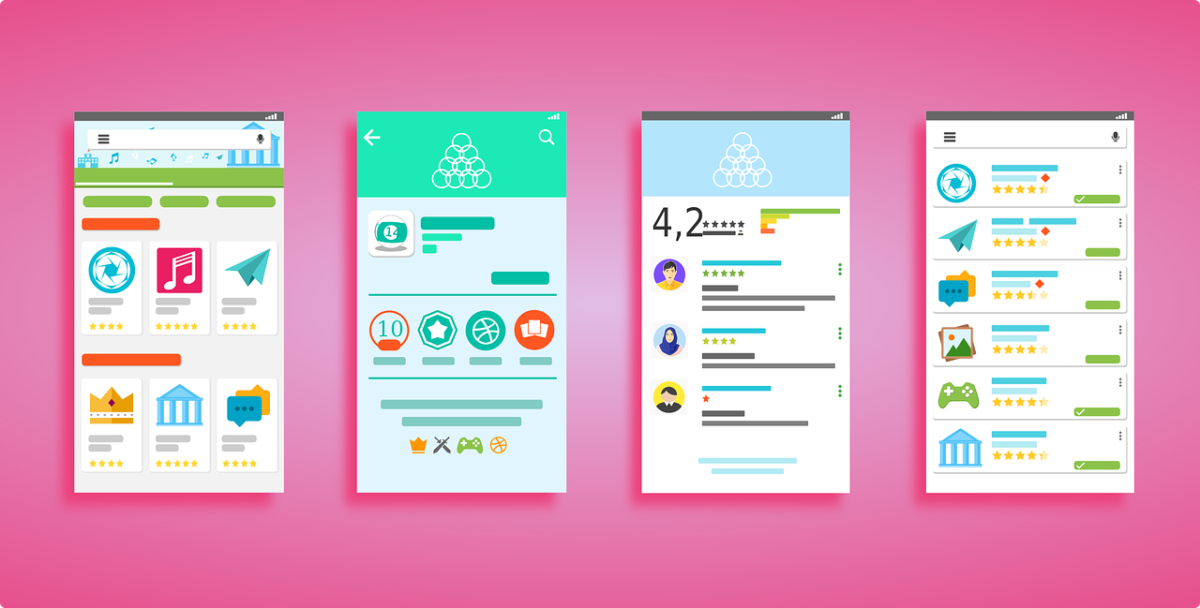
Creating beautiful Flutter apps is a combination of design principles, UI components, animations, and overall user experience. Here are some examples of stunning Flutter apps that showcase the platform’s capability to deliver visually appealing and engaging user interfaces:

Developers Guide for Building Beautiful Flutter Apps

  1. Reflectly:

Reflectly is a journaling app that utilizes Flutter to create a visually stunning and intuitive user interface. With its minimalist design, smooth animations, and vibrant color scheme, Reflectly provides users with an immersive journaling experience.

  1. Watermaniac:

Watermaniac is a hydration tracking app built with Flutter. It features a clean and modern design, with intuitive controls for logging water intake and setting hydration goals. The app uses subtle animations and transitions to enhance the user experience.

  1. Foxy Music:

Foxy Music is a music player app designed using Flutter. It features a sleek and stylish interface, with customizable themes, album artwork display, and gesture-based controls for playback. The app’s smooth animations and fluid transitions make it a joy to use.

  1. Gourmet Recipe Manager:

Gourmet Recipe Manager is a recipe management app built with Flutter. It boasts a beautiful user interface with high-quality images, organized layouts, and interactive features for browsing and saving recipes. The app’s use of Flutter’s animation capabilities adds an extra layer of polish to the overall experience.

  1. Theia Weather:

Theia Weather is a weather app that leverages Flutter’s capabilities to deliver a visually stunning and informative user interface. With its dynamic weather animations, detailed forecasts, and interactive maps, Theia Weather provides users with a delightful weather tracking experience.

  1. TravelBuddy:

TravelBuddy is a travel planning app designed using Flutter. It features a clean and intuitive interface, with rich imagery, smooth animations, and seamless navigation between destinations. The app’s use of Flutter’s widget library and custom animations enhances the user experience while planning trips.

  1. Clima Weather:

Clima Weather is another weather app built with Flutter. It offers a simple yet elegant interface, with real-time weather updates, location-based forecasts, and smooth transitions between screens. The app’s use of Flutter’s layout widgets and design elements makes it a standout choice for weather tracking.

  1. Fluttery Bank:

Fluttery Bank is a banking app concept designed using Flutter. It features a modern and minimalist interface, with clean typography, subtle animations, and intuitive navigation. The app’s use of Flutter’s state management and UI components creates a seamless banking experience for users.

  1. Be Thrifty Today.

A simple and secure money management app that helps track income and expenses. It has an intuitive UI designed using Flutter and Firebase.

  1. Invoice Ninja.

A robust business suite for documenting invoices, tasks, expenses, inventory management, automation, and more. The companion app was created using Flutter Redux Starter.

  1. Trace.

A modern crypto portfolio and market explorer built entirely with Flutter. It offers features like portfolio overview, aggregate market explorer, transaction history, and more.

  1. Receipt Manager.

A minimalistic app for managing receipts that uses OCR to store receipts permanently in an SQL database.

  1. HADWIN.

An app that demonstrates payment services and transaction interfaces while teaching design patterns and state management with the Provider pattern.

These examples demonstrate the versatility and beauty of Flutter in creating visually stunning and engaging mobile apps across various categories. Whether it’s journaling, hydration tracking, music playback, recipe management, weather tracking, travel planning, banking, or any other application, Flutter empowers developers to create beautiful and functional user interfaces that delight users and elevate the overall app experience.

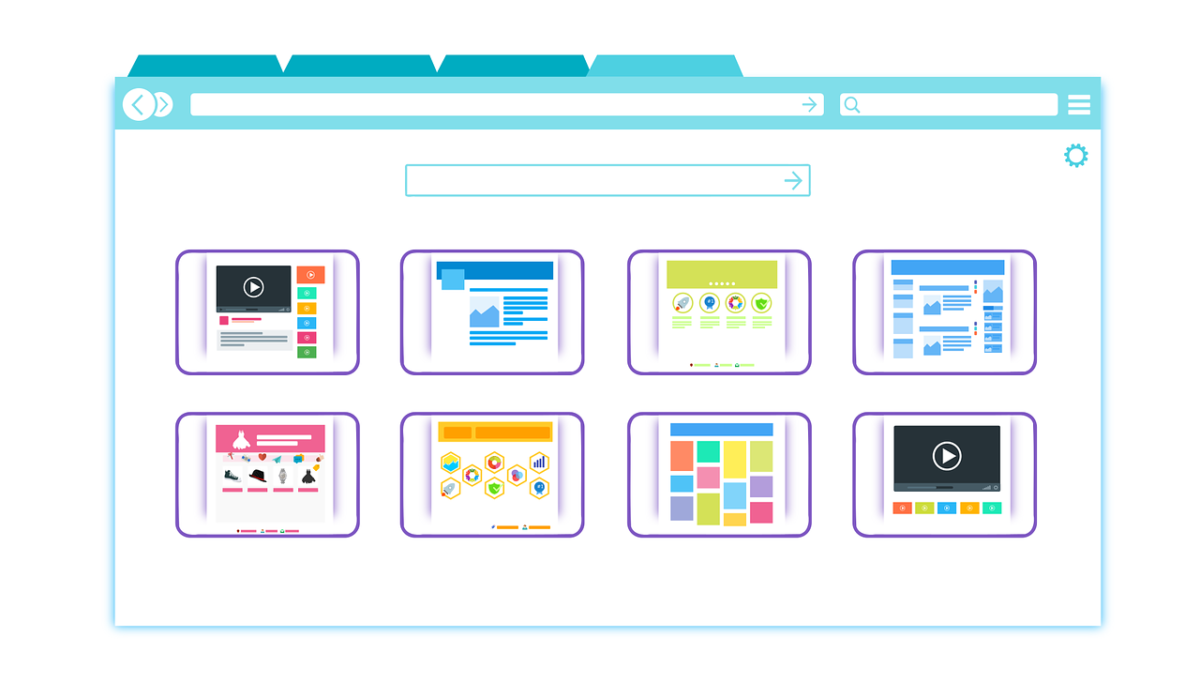
Additionally, there are numerous pre-built Flutter UI templates available for developers to kickstart their projects.

Developing visually appealing and user-friendly mobile apps is essential in today’s competitive market. With the rise of cross-platform frameworks like Flutter, developers have more flexibility than ever to create stunning applications that work seamlessly on both Android and iOS devices. In this article, we’ll explore some best practices and showcase a few beautiful Flutter UI templates to inspire your next project.

Start with a Solid Foundation

Before diving into UI design, ensure your app has a robust architecture. Consider using the Material Design guidelines as a starting point. Material Design provides consistent patterns, components, and behaviors that make your app feel cohesive and familiar to users.

  1. Responsive Layouts

Flutter allows you to create responsive layouts that adapt to different screen sizes. Use Media Query to determine the device’s dimensions and adjust your UI accordingly. Consider using Flex widgets for flexible layouts that scale gracefully.

  1. Beautiful Widgets 

Provides an extensive Flutter library of widgets, including buttons, cards, lists, and more. Customize these widgets to match your app’s theme. For example:

  1. Use the Elevated Button widget for primary actions.
  2. Employ the Card widget for displaying content in a visually appealing way.
  3. Leverage the List View widget for scrollable lists.
  4. Animations and Transitions

Add subtle animations and transitions to enhance the user experience. Flutter’s animation framework allows you to create smooth transitions between screens, fade-in effects, and delightful interactions.

  1. Typography and Fonts

Choose fonts wisely! Typography plays a significant role in app design. Use readable fonts that align with your app’s branding. Flutter supports custom fonts, so explore Google Fonts or other font libraries.

  1. Color Palette

 Select a cohesive color palette for your app. Consistent colors create harmony throughout the UI. Material Design provides predefined color schemes, but feel free to customize them to match your brand identity.

  1. Flutter UI Component App

A set of 200+ components enabling developers to create feature-rich hybrid apps quickly for both iOS and Android.

  1. Prokit – Flutter App UI Kit

A high-quality UI kit combining various app templates based on Material Design Guidelines. [More info / Download]

  1. Travel World – Flutter UI/UX Template

A template made with Flutter that you can integrate into existing applications or use as a starting point for new projects.  – [More info / Download]]

  1. HookUp4U

A Tinder-like Flutter Dating UI. HookUp4U is a hybrid mobile dating user interface based on Flutter. It includes all the UI elements and effects you’d expect from a regular dating app. You can use this UI to create a fully functional dating app. [More info / Download] (https://flutterawesome.com/40-beautifu-flutter-ui-themes-for-developers/)

Remember that these templates save time by providing pre-written code for common app features, allowing you to focus on customizing your app’s unique functionality.

Conclusion:

Flutter has revolutionized the way developers create mobile applications, enabling them to build stunning and highly functional apps with ease. The examples mentioned above showcase the beauty and versatility of Flutter in creating visually appealing and engaging user interfaces across different categories.

From journaling and tracking to music playback, recipe management, weather tracking, travel planning, banking, and more, Flutter offers endless possibilities for app development. Its rich set of UI components, customizable widgets, and smooth animations empower developers to craft unique and immersive user experiences that captivate users and set their apps apart from the competition.

As Flutter continues to evolve and gain popularity in the developer community, we can expect to see even more beautiful and innovative apps emerge in the future. Whether you’re a seasoned developer or just getting started with Flutter, the platform provides the tools and resources you need to bring your app ideas to life and make a lasting impact in the mobile app landscape.

So, whether you’re building a personal project, launching a startup, or contributing to a larger enterprise, embrace the power of Flutter to create beautiful, functional, and user-friendly apps that delight users and leave a lasting impression. With Flutter, the possibilities are truly limitless, and the journey of app development is as exciting as the apps themselves.

Categories
flutter app iOS Mobile app Uncategorized

Are You Looking to publish iOS app Flutter? Here’s a step-by-step guide to help you through the process.

To publish an iOS app built with Flutter, you’ll need to follow a series of steps outlined by Apple’s App Store guidelines. Here’s a simplified guide to help you navigate through the process.

Prepare Your App for Submission:

  • Ensure your app complies with Apple’s App Store Review Guidelines.
  • This includes adhering to design, content, and technical requirements.
  • Test your app thoroughly to identify and resolve any bugs or issues.
  • Make sure your app supports all required device sizes and orientations.
  • Generate screenshots and promotional materials for your app listing on the App Store.

Create an App Store Connect Account:

  • Sign in to App Store Connect using your Apple ID.
  • If you haven’t already, enroll in the Apple Developer Program. This is required to distribute apps on the App Store.

Prepare Your App for Distribution:

  • Generate a production build of your Flutter app for iOS.
  • Obtain the necessary certificates, identifiers, and profiles through the Apple Developer portal. This includes a Distribution Certificate, an App ID, and a Provisioning Profile.
  • Configure your Flutter project to use these certificates and profiles for code signing during the build process.

Archive and Validate Your App:

  • Use Xcode to archive your Flutter app for distribution.
  • Validate the archive to ensure it meets Apple’s requirements. This step checks for any missing or incorrect settings that could prevent your app from being submitted to the App Store.

Submit Your App for Review:

  • Once your app archive has been successfully validated, submit it to the App Store for review.
  • Provide all necessary information, such as app name, description, keywords, categories, and pricing.
  • Upload screenshots, app previews, and promotional artwork as per Apple’s guidelines.

Wait for App Review:

  • Apple’s App Review team will evaluate your app to ensure it complies with their guidelines and standards.
  • This process typically takes several days, but it can vary depending on the volume of submissions and the complexity of your app.

Release Your App:

  • If your app passes the review process, you’ll receive an email notification indicating that it has been approved for release.
  • Log in to App Store Connect to set the release date and pricing for your app.
  • Once everything is configured, click the “Release” button to make your app available on the App Store.

Monitor Performance and Respond to Feedback:

  • Keep an eye on your app’s performance metrics, including downloads, user reviews, and ratings.
  • Respond promptly to user feedback and address any issues or concerns raised by your app’s users.

By following these steps, you can successfully publish your Flutter app on the iOS App Store and make it available to millions of users worldwide. Remember to stay informed about Apple’s guidelines and best practices to ensure a smooth submission and review process.

The process of publishing the Flutter app on ios

Preliminaries

  1. You’ll need Xcode to build and release your app.
  2. Ensure that your app meets Apple’s App Review Guidelines before proceeding.
  3. To publish your app to the App Store, you must first enroll in the Apple Developer Program. There are various membership options available, so choose the one that suits your needs.

Register Your App on App Store Connect

  1. Bundle ID Every iOS application is associated with a unique Bundle ID registered with Apple. Follow these steps
  2. Open the App IDs page of your developer account.
  3. Click “+” to create a new Bundle ID.
  4. Enter an app name, select Explicit App ID, and provide an ID.
  5. Select the services your app uses and continue.
  6. Confirm the details and click Register to complete the process.
  7. Create an Application Record on App Store Connect
  8. Open App Store Connect in your browser.
  9. Click My Apps then select New App.

Fill in your app details, ensuring that iOS is checked (Flutter does not currently support tvOS).

Review Xcode Project Settings

Review important settings in the Xcode workspace, such as provisioning profiles, signing certificates, and deployment targets. Make sure everything aligns with your app’s requirements.

Build and Release Your App


  1. To build a release version of your Flutter app for iOS, run the following command in your terminal.
  1. This will create a release build that you can use for distribution.

Upload Your App to App Store Connect

  1. Create an app bundle using Xcode or other tools.
  2. Upload the app bundle to App Store Connect.
  3. Set up additional details like pricing, screenshots, and descriptions.

TestFlight (Optional)

If you want to test your app with a limited audience before releasing it publicly, use Apple’s Test Flight platform.

Release Your App on the App Store

  1.  1 Once everything is set up, submit your app for review. won the App Store.
  2. Monitor its status and address any feedback from Apple during the review process.

To enroll in the Apple Developer Program, follow these steps based on whether you’re an individual or an organization

Individual Enrollment

  1. If you’re an individual or a sole proprietor/single-person business, you can get started by signing in with your Apple ID (with two-factor authentication turned on).
  2. Ensure that you’re of the legal age of majority in your region.
  3. Provide basic personal information, including your legal name and address.
  4. Remember not to enter an alias, nickname, or company name as your first or last name, as this could cause delays in the approval process.

Organization Enrollment

  1. If you’re enrolling your organization, here’s what you’ll need.
  2. D-U-N-S® Number Your organization must have a D-U-N-S Number assigned by Dun & Bradstreet. This unique nine-digit number verifies your organization’s identity and legal entity status. Check if your organization already has one and request it if necessary (they’re free in most jurisdictions).
  3. Legal Entity Status Your organization must be a legal entity (not DBAs, fictitious businesses, trade names, or branches) to enter into contracts with Apple.
  4. Legal Binding Authority as the person enrolling your organization, you must have the legal authority to bind your organization to legal agreements. This authority can be granted to you by being the owner/founder, an executive team member, a senior project lead, or an employee with proper authorization.
  1. Website Your organization’s website must be publicly available and associated with your domain name.


Starting Your Enrollment

  1.  Make sure you have an Apple ID with two-factor authentication enabled.
  2. Two-factor authentication adds an extra layer of security to your account.
  3. You can enroll through the Apple Developer app or on the web.

Membership Fees

  1. The Apple Developer Program costs USD 99 per membership year (or in local currency where available).
  2. If you’re under the age of majority in your region, you may be able to enroll with your parent’s consent.

To enable two-factor authentication for your Apple ID, follow these steps:

On your iPhone

  1. Go to Settings.
  2. Tap on your name at the top.
  3. Select Sign-In & Security.
  4. Tap Turn On Two-Factor Authentication, then tap Continue.
  5. Enter a trusted phone number (the number you’ll use to receive verification codes), then tap Next.
  6. A verification code will be sent to your trusted phone number. Enter the verification code on your iPhone.
  7. Two-factor authentication is now turned on for your Apple ID, and your iPhone becomes a trusted device.

Add another trusted device

  1. After enabling two-factor authentication on your iPhone, sign in with the same Apple ID on the device you want to add.
  2. When prompted, enter the six-digit verification code that appears on your iPhone, another trusted device, a trusted phone number, or your Mac.
  3. Enter the verification code on the new device.
  4. You won’t be asked for a verification code again unless you sign out completely, erase your device, sign in to your Apple ID account page in a web browser, or change your Apple ID password for security reasons.

Add or remove a trusted phone number

  1. Go to Settings > [your name] > Sign-In & Security.
  2. Tap Edit (above the list of trusted phone numbers), then enter your device passcode when prompted.
  3. To add a number, tap Add a Trusted Phone Number, then enter the phone number.
  4. To remove a number, tap next to the phone number.
  5. Trusted phone numbers don’t automatically receive verification codes. If you can’t access any trusted devices when setting up a new device for two-factor authentication, tap “Didn’t get a verification code?” on the new device and choose one of your trusted phone numbers to receive the verification code.

View or remove trusted devices

Go to Settings >. A list of devices associated with your Apple ID appears near the bottom of the screen. A trusted device must use iOS 17, iPad 17, or OS X 13 (or later) for two-factor authentication.

Remember that this is just an overview, and each step involves more detailed configurations. For more comprehensive instructions and detailed procedures, refer to [Flutter’s official documentation on iOS deployment] (https://docs.flutter.dev/deployment/ios) or other resources like [Instabug’s guide] (https://www.instabug.com/blog/how-to-release-your-flutter-app-for-ios-and-android). Good luck with publishing your app! refer to [Apple’s official enrollment page] (https://developer.apple.com/programs/enroll/) or their [support documentation] (https://developer.apple.com/support/enrollment/). Good luck with your enrollment!

Conclusion

Publishing your Flutter app on the iOS App Store marks a significant milestone in your app development journey. By following the steps outlined in this guide, you’ve successfully navigated through the intricacies of Apple’s submission and review process.

As your app becomes available to millions of iOS users worldwide, it’s essential to maintain its quality, performance, and relevance. Regularly update your app to incorporate new features, address user feedback, and stay ahead of emerging trends in the mobile app landscape.

Remember that publishing your app is just the beginning of its lifecycle. Continuously monitor its performance metrics, analyze user engagement data, and iterate on your app to ensure its long-term success.

Lastly, celebrate your achievement! Publishing an app on the iOS App Store is a testament to your hard work, creativity, and dedication. Embrace the journey ahead as you strive to create impactful experiences for your users and leave a lasting impression in the digital world.


Categories
flutter app Mobile app

Are you Here to Explore the Cost of Flutter App Development?

Flutter, Google’s open-source UI toolkit, has gained significant popularity among developers for its ability to build high-quality, cross-platform applications efficiently. However, one of the most common questions that arise in the minds of entrepreneurs and businesses is. “How much does Flutter app development cost?” In this blog post, we’ll delve into the factors that influence the cost of Flutter app development and provide insights to help you budget effectively for your project.

When it comes to Flutter app development, the cost can vary based on several factors. Let’s explore the intricacies of estimating the expenses involved in creating a Flutter app for your business.

Understanding the Cost of Flutter App Development

Before diving into specifics, it’s essential to understand the various factors that contribute to the overall cost of Flutter app development. These factors include,

App Complexity:

The complexity of your app, including its features, functionality, and integrations, significantly impacts development costs. Simple apps with basic features will be more affordable to develop compared to complex apps with advanced functionalities.

Design Requirements:

The design elements of your app, such as UI/UX design, animations, and custom graphics, can influence development costs. Highly customized designs and intricate animations may require more time and resources, thus increasing the overall cost.

Platform Compatibility

Flutter allows for cross-platform development, meaning you can build apps for both iOS and Android from a single codebase. However, developing and testing for multiple platforms may incur additional costs compared to developing for a single platform.

Third-Party Integrations:

Integrating third-party APIs, services, or plugins into your app, such as payment gateways, social media login, or analytics tools, may involve additional development effort and cost.

Backend Development:

The complexity of the backend infrastructure required to support your app, such as user authentication, data storage, and server-side logic, can impact development costs. Integrating a backend-as-a-service (BaaS) solution like Firebase may reduce development costs compared to building a custom backend from scratch.


Factors Affecting Flutter App Development Cost

Features and Complexity

  1. Flutter apps can be categorized into three sub-categories based on complexity: basic, medium, and complex.
  2. A basic Flutter app with simple features typically costs around $40,000 to $60,000.
  3. A medium-complexity Flutter app may range from $60,000 to $120,000.
  4. Complex apps, which involve advanced features and integrations, can start at $120,000.
  1. Starting with a Minimum Viable Product (MVP) is recommended to test your app concept’s viability and gather early user feedback.

UI/UX Design

  1. Mobile app navigation, typography, and color schemes are crucial for a great user experience.
  2. Design considerations impact development time and cost.

Platform Integration

  1.  Integrating with other platforms or services affects development complexity and cost.

Development Timeline

  1. The time required for development directly influences the overall cost.
  2. Simple apps take around 2-3 months, medium-complexity apps require 3-6 months, and complex apps may take 6-14 months.

Why Choose Flutter?

  1. Flutter is highly economical compared to other cross-platform frameworks.
  2. It offers code reuse, allowing developers to create apps for multiple platforms using a single codebase.
  3. Startups and SMBs benefit from lower development costs due to faster app evolution.
  4. Exceptional user experience is achievable through Flutter-based UIs on any platform.

Widgets and Rendering Engine

  1. Flutter’s rich set of widgets simplifies UI development.
  2. Its unique rendering engine ensures consistent UI across platforms.

Estimated Costs

  1. Simple Flutter App: $10,000 – $55,000
  2. Middle Complexity App: $60,000 – $110,000
  3. Highly Complex Flutter App: $120,000 – $200,000+

Remember that these estimates are approximate and can vary based on specific project requirements. It’s essential to discuss your project details with experienced developers to get an accurate cost assessment.

In summary, the cost of developing a Flutter app can range from $10,000 to $200,000 or more, depending on various factors involved in the development process. If you have specific features or requirements in mind, consulting with experts will help you tailor the estimate to your unique project needs.

Let’s explore how long it takes to develop a Flutter app. The development timeline can vary based on the app’s size, complexity, and specific requirements. Here are the key factors to consider,

Certainly! Choosing the right app size for your project is crucial to ensure optimal user experience and efficient resource utilization. Let’s explore how to make informed decisions,


Understanding App Size

  1. App size refers to the amount of data associated with your app.
  2. We can discuss app sizes in several ways.
  3. Download Size. The size when users download the app from an app store (compressed for efficient transfer).
  4. Install Size. The size directly after installation (uncompressed content on disk).
  5. Storage Size. The size when the app is in use, including caches (audio files, images) stored on the device.
  6. Update Size. The size when downloading an app update.

Why App Size Matters

  1. In emerging markets, many users have older-generation smartphones with limited storage space.
  2. These users must prioritize valuable content due to storage constraints.
  3. App size impacts both network-related (download) and storage-related aspects.

Debug Builds vs. Release Builds

  1. Debug builds (used during development) are larger due to debugging overhead (hot reload, source-level debugging).
  2. Release builds (for production) are more representative of end-users download sizes.

Estimating Total Size,

For Android:

Follow Google Play Console instructions to check download and install sizes.

Upload your application binary to Google Play Console and view sizes based on an XXXHDPI (~640dpi) device.

For iOS:

Create an Xcode App Size Report by configuring the app version and build.

Run `flutter build ipa –export-method development`.

Open the archive in Xcode, distribute the app, and select “all compatible device variants.”

Optimizing App Size

  1. Remove unused resources (images, fonts, libraries).
  1. Use vector graphics where possible.
  1. Compress images without sacrificing quality.
  1. Minimize third-party dependencies.
  1. Consider code splitting or dynamic loading for large apps.


App Size Categories

  1. Apps are typically categorized into three sizes: small, medium, and large.
  2. Each category has different challenges and approaches in the development lifecycle.

Small Apps

1 Small apps are straightforward projects with a narrow focus.

2 They address specific tasks or cater to niche markets.

3 Development stages for small apps include.

4 Pre-Development (1-2 Weeks) Wireframing and refining UI/UX designs.

5 Development (1-2 Months) Basic coding and feature integration.

6 Testing (1-2 Weeks) Functional testing and bug fixing.

Medium Apps 

  1. Medium-complexity apps take around 3-4 months to develop.
  2. These apps have more features and integrations than small apps.
  3. The development process involves additional design considerations and coding efforts.

Large Apps

  1.  Large-scale apps can take longer, depending on their complexity.
  1. They involve extensive UI/UX design, backend development, and thorough testing.
  1. The timeline for large apps can range from several months to over a year.

Why Choose Flutter? 

  1. Flutter allows developers to create native mobile applications with a single codebase.
  1. It supports cross-platform development for Android, iOS, web, and desktop.
  2. Features like hot reload enhance productivity and reduce development time.

Time to Market 

  1. Flutter’s single codebase approach accelerates development.
  1. Quicker time to market is achievable due to reduced development efforts.

Here’s a way to estimate the total size of your app.

Functional Requirements

  1. Consider the features and functionality your app will have. Break them down into categories such as users and accounts, user-generated content, dates and locations, social engagement, billing, analytics, external APIs, security, and any app-specific development.
  2. Estimate the development effort for each category in terms of days or weeks.

UI Complexity

  1. Decide on the level of UI you want: MVP (Minimum Viable Product), basic, or polished.
  2. Estimate the development effort for UI design and implementation as a percentage of the total development time.

Non-Functional Requirements

  1. Consider non-functional aspects like security (SSL certificates, DoS protection, two-factor authentication), external integrations (third-party services, APIs), and admin features (user admin pages, analytics, crash reporting).
  2. Estimate the development effort for each non-functional requirement.

Mobile-Specific Features

  1. If your app is mobile-based (iOS or Android), consider mobile-specific features like app icon design, cloud syncing, device sensor data, barcodes/QR codes, health data, and Apple Watch integration.
  2. Estimate the development effort for these features.

Total Size Calculation

Sum up the estimated development efforts from all categories to get an overall estimate of your app’s size.

Remember that this is an estimation based on your project’s specific requirements. Actual sizes may vary during development. Additionally, tools like the Google Play Console can help you monitor download and install sizes for Android apps. This estimation is based on your project’s specific requirements and may vary during actual development.

Prioritize essential functionality while keeping the user experience smooth and efficient. If you have specific requirements or need further guidance, consult experienced developers to tailor your choices to your project’s needs.

In summary, the time required for developing a Flutter app depends on its size and complexity. Small apps can be completed in a few months, while large-scale projects may take longer. Choosing Flutter streamlines the process and ensures consistent performance across platforms. If you’re considering Flutter for your next app, explore its benefits, and consult experienced developers for accurate estimates tailored to your project’s needs.

Conclusion

In conclusion, the cost of Flutter app development varies depending on factors such as app complexity, design requirements, platform compatibility, third-party integrations, backend development, and development team composition. By understanding these factors and planning accordingly, you can budget effectively for your Flutter app development project.


Whether you’re building a simple MVP (Minimum Viable Product) to validate your idea or a feature-rich app to disrupt the market, investing in quality development is key to achieving your goals. Consider partnering with experienced Flutter app development professionals who can guide you through the process and deliver a high-quality app that meets your requirements and exceeds your expectations.

Categories
flutter app Mobile app

Do you want to know about the Flutter marketplace app?

Let’s delve into the world of Flutter marketplace apps. The online retail industry has experienced a significant transformation over the past few years, with online platforms evolving from mere alternatives to becoming central players in the retail landscape. One notable trend is the substantial growth of marketplace economies. According to surveys and estimates, marketplace sales are projected to outpace e-commerce sales within the next four years, with online marketplaces expected to reach a staggering $600 billion by 2027. One particular niche where Flutter excels is in the development of marketplace apps. These platforms connect buyers and sellers, offering a diverse range of products or services in various categories. In this blog post, we’ll delve into the world of Flutter marketplace apps, exploring their features, benefits, and how to build one from scratch.

Understanding Flutter Marketplace Apps

Marketplace apps, also known as e-commerce platforms, serve as digital marketplaces where users can buy and sell goods or services. These apps facilitate transactions between buyers and sellers, providing a seamless and secure environment for commerce.

Benefits of Using Flutter for Marketplace Apps

Flutter offers several advantages for building marketplace apps:

  1. Cross-Platform Compatibility:

With Flutter, developers can write code once and deploy it across multiple platforms, including iOS, Android, and web. This ensures a consistent user experience across devices, reducing development time and effort.

  1. Fast Performance:

Flutter’s reactive framework and native performance ensure fast and smooth user interactions, essential for a seamless shopping experience.

  1. Beautiful UI Design:

Flutter’s rich set of customizable widgets and material design principles allow developers to create visually appealing and intuitive user interfaces that enhance the shopping experience.

  1. Hot Reload:

Flutter’s hot reload feature enables developers to make real-time changes to the app’s code and see the results instantly, speeding up the development process and facilitating rapid iteration.

Key Features of Flutter Marketplace Apps

  1. User Authentication:

Secure user authentication mechanisms, such as email/password login, social media login, or OTP verification, ensure the safety of user accounts and transactions.

  1. Product Listings:

Sellers can create listings for their products or services, including images, descriptions, pricing, and other relevant details. Users can browse through these listings, filter and search for products based on their preferences.

  1. Shopping Cart and Checkout:

Users can add products to their shopping carts, review their selections, and proceed to checkout to complete their purchases. Integration with payment gateways allows for secure and convenient payment processing.

  1. Order Management:

Sellers can manage orders, track order status, and communicate with buyers regarding their purchases. Users can also view their order history, track shipments, and contact sellers if needed.

  1. Reviews and Ratings:

Users can leave reviews and ratings for products and sellers, helping other users make informed decisions. A robust rating system promotes trust and transparency within the marketplace community.

Building a Flutter Marketplace App

  1. Project Setup:

 Create a new Flutter project or use an existing one as the foundation for your marketplace app development.

  1. UI Design:

Design the user interface for your marketplace app using Flutter’s widgets and material design guidelines. Focus on creating a visually appealing and intuitive layout that enhances the shopping experience.

  1. Backend Development:

Implement the backend functionality for user authentication, product listings, shopping cart management, order processing, and other essential features. You can use Firebase, AWS, or other backend services for this purpose.

  1. Integration:

Integrate third-party APIs for features like payment processing, geolocation, push notifications, and analytics to enhance the functionality of your marketplace app.

  1. Testing and Debugging:

Thoroughly test your marketplace app on different devices and screen sizes to ensure compatibility and responsiveness. Use Flutter’s debugging tools to identify and fix any issues.

  1. Deployment:

Once your marketplace app is ready, deploy it to the Google Play Store, Apple App Store, or other app distribution platforms to make it available to users.

Flutter marketplace journey

When embarking on a marketplace app development journey, selecting the right technology stack is crucial. You need a robust and stable framework that can support you in delivering capable and reliable applications. In this guide, we’ll explore how Flutter, Google’s open-source UI software development kit (SDK), can be leveraged to build, test, and deploy marketplace applications.


Elevating Marketplace Apps: UI/UX Design Principles for Flutter


  1. Understanding the Role of UI/UX in Marketplace App Success


User interface (UI) and user experience (UX) play pivotal roles in shaping the success of a marketplace app. Here’s how:

  1. First Impressions: UI/UX design contributes significantly to first impressions. Users should be able to load the app quickly (within 3 seconds), interact seamlessly, navigate intuitively, and complete tasks assigned for specific screens without interruption.
  2. Improving First Impressions: Your marketplace app is your virtual identity. A usable interface ensures positive impressions. By making it accessible and intuitive, you create a welcoming experience for every user encountering your app for the first time.


  1. UI/UX Design Principles for Flutter Marketplace Apps Let’s dive into specific design principles:Speed and Responsiveness

Fast Loading, Users expect apps to load swiftly. Flutter’s performance benefits allow you to achieve this goal.

Intuitive Navigation

Clear Navigation Paths, Design navigation menus that guide users seamlessly through different sections of your app.

Consistency

Unified Design Elements, maintain consistency across screens by using consistent fonts, colors, and visual elements.

Accessibility

Inclusive Design ensures your app is accessible to all users, including those with disabilities.

User-Centric Approach

User Research, Understand user behavior, preferences, and pain points through research.

Visual Appeal

Attractive Visuals, Use appealing graphics, icons, and animations to enhance engagement.

  1. Leveraging Flutter for Marketplace App Development

Flutter offers several advantages for building marketplace apps:


  • Hot Reload, Developers can instantly see changes during development without restarting the app.
  • Rich Widgets, Flutter provides a wide range of customizable widgets for creating beautiful interfaces
  • Cross-platform compatibility, develop once and deploy on both Android and iOS platforms.
  • Community Support, an active community that contributes to plugins, packages, and solutions.


In summary, Flutter empowers developers to create delightful marketplace apps by combining robust functionality with an engaging user experience. So whether you’re building an e-commerce platform.

Certainly! Building a successful marketplace app involves several critical aspects, from UI/UX design to payment integration. Let’s explore how Flutter can be used to create a robust marketplace application.

When planning a marketplace application, choosing the right tech stack is crucial. You need a strong and stable framework that can support you in delivering capable and reliable applications. Flutter, Google’s open-source UI toolkit for building natively compiled applications, is an excellent choice for developing marketplace apps.


Elevating Marketplace Apps: UI/UX Design Principles for Flutter


Once you’ve conceptualized your idea and mapped out the app development roadmap, it’s time to focus on UI/UX design. The user interface (UI) plays a pivotal role in ensuring smooth interactions and increasing user engagement. Here are some essential UI/UX design principles for building a successful Flutter marketplace app:


  1. Understanding the Role of UI/UX in Marketplace App Success


  • A well-designed UI/UX helps build a positive first impression.
  • Users should be able to load the app quickly (within 3 seconds), interact seamlessly, navigate intuitively, and complete tasks without interruption.
  • Prioritize usability and accessibility to enhance the overall user experience.
  1. Improving First Impressions

  • Your marketplace app is your virtual identity. Design an interface that guarantees good impressions.
  • Make it accessible and intuitive so that every customer feels satisfied during their initial interaction with your app.
  1. UI/UX Design Considerations

  • Consistent Branding: Ensure that your app’s branding aligns with your business identity.
  • Intuitive Navigation: Design clear navigation paths so users can easily find what they’re looking for.
  • Task Completion: Each screen should allow users to complete their tasks seamlessly.
  • Responsive Design: Optimize for various devices and screen sizes.


Configuring Stripe Connect for Payments


In Part 1 of our blog series on building a Flutter marketplace app with Stripe Connect, we covered the initial steps of configuring payments using Stripe Connect. Here’s a summary,


  1. Stripe Account Setup


  • Log into your Stripe account and ensure you’re in Test Mode.
  • Obtain your Publishable key and Secret Key from the Developers > API Keys page.


conclusion

Flutter marketplace apps offer a versatile and efficient solution for creating digital marketplaces that connect buyers and sellers. With Flutter’s cross-platform capabilities, fast performance, and beautiful UI design, developers can build marketplace apps that deliver a seamless and enjoyable shopping experience for users. Whether you’re a budding entrepreneur looking to launch your marketplace platform or a developer seeking to expand your skillset, Flutter provides the tools and resources you need to bring your marketplace app ideas to life. So, dive into the world of Flutter marketplace apps and unleash your creativity in the realm of e-commerce. Whether you’re building a niche marketplace for handmade crafts, a comprehensive platform for global e-commerce, or anything in between, Flutter provides the tools and flexibility to bring your vision to life. With its fast performance, hot reload feature, and extensive widget library, Flutter streamlines the development process, allowing you to focus on creating an exceptional user experience.

As you set about on your journey to build a Flutter marketplace app, remember to prioritize user engagement, security, and scalability. Listen to feedback from your users, iterate on your app’s features, and stay updated with the latest trends and technologies in the e-commerce landscape.

In the energetic and ever-evolving world of digital marketplaces, Flutter empowers developers to create innovative solutions that drive growth, foster connections, and revolutionize the way we buy and sell goods and services online. So, seize the opportunity, unleash your creativity, and build the next generation of Flutter marketplace apps that will shape the future of e-commerce.

Categories
flutter app Mobile app

Are You Here To Know How To Hosting a Flutter Web App?

In today’s digital age, having a strong online presence is crucial for businesses and developers alike. With the rise of cross-platform frameworks like Flutter, developers can now build stunning web applications with ease. However, once the development is complete, the next step is hosting the Flutter web app to make it accessible to users worldwide. In this guide, we’ll delve into the process of hosting a Flutter web app, covering everything from choosing a hosting provider to deployment strategies.

Understanding Flutter Web Hosting

What is Flutter web hosting?

Why is hosting necessary for Flutter web apps?

Preparing Your Flutter Web App for Hosting

Optimizing code and assets

Testing across different browsers and devices

Ensuring performance and responsiveness

Choosing a Hosting Provider

Evaluating different hosting options (Firebase Hosting, Netlify, Vercel, GitHub Pages, etc.)

Factors to consider: scalability, pricing, ease of use, support for Flutter web apps

Setting Up Your Hosting Environment

Creating an account (if necessary)

Configuring project settings

Connecting your Flutter web app to the hosting platform

Building Your Flutter Web App

Compiling Flutter code for the web platform

Generating optimized JavaScript, HTML, and CSS files

Resolving any build errors or dependencies

Deploying Your Flutter Web App

Step-by-step deployment process with Firebase Hosting

Installing Firebase CLI

Logging in to Firebase

Initializing Firebase Hosting for your project

Deploying your Flutter web app

Alternative deployment methods for other hosting providers

Configuring Custom Domains (Optional)

Registering a custom domain (if you don’t have one)

Updating DNS settings to point to your hosting provider

Configuring SSL certificates for secure connections

Monitoring and Maintenance

Monitoring app performance and uptime

Handling updates and version control

Scaling resources as needed to accommodate increased traffic

Hosting a “Flutter web app” involves a few steps. Let’s walk through them:

1. Build the App for Release

a. First build your app for deployment using the flutter build web command. This generates the app, including assets, and places the files into the /build/web directory of your project.

b. You can also choose which renderer to use by using the `web-renderer` option.

c. The release build of a simple app has the following structure:

d. Launch a web server (e.g., python -m http. server 8000`), and open the `/build/web` directory. Navigate to `localhost:8000` in your browser to view the release version of your app.

2. Deploying to the Web

a. When you’re ready to deploy your app, you can upload the release bundle to various services.
b. Firebase Hosting Use the Firebase CLI to build and release your Flutter app with Firebase Hosting.
c. Install or update the Firebase CLI. npm install -g firebase-tools
Initialize Firebase firebase init hosting.
d. Choose Flutter Web as your web framework.
e. Deploy the app to Firebase Hosting. Firebase deploy
This command automatically runs `flutter build web –release so you don’t need a separate build step.

  1. Other options include GitHub Pages, Google Cloud Hosting, or configuring an Apache server.

    3. Requirements
    a. To create a Flutter app with web support, you need:
    b. Flutter SDK (install instructions [here](https://flutter.dev/docs/get-started/install))
    c. Chrome (for debugging)
    d. Optional: An IDE that supports Flutter (e.g., Visual Studio Code, Android Studio, IntelliJ IDEA) with Flutter and Dart plugins installed.

    Remember that hot reload is not supported in a web browser, but hot restart works. Happy hosting!
    Let’s dive into what Firebase Hosting is and how it can simplify your web app deployment process.


What is Firebase Hosting?

Firebase Hosting is a fast, secure, and reliable hosting service provided by Google for developers to deploy web applications. It’s designed to handle both static assets (such as HTML, CSS, and JavaScript files) and dynamic content generation using serverless functions. Here are some key features:

Fast and Secure

  • Zero-configuration SSL Content is always delivered securely over HTTPS.
  • Files are cached on SSDs at CDN edges around the world and served as gzip or Brotli for optimal compression.
  • No matter where your users are, the content is delivered quickly.

Easy Deployment

  • With a single command using the Firebase CLI (`firebase deploy`), you can get your app up and running in seconds.
  • Hosting provides one-click rollbacks if you need to undo a deployment.

Preview Changes Before Going Live

  • View and test your changes on a locally hosted URL.
  • Interact with an emulated backend.
  • Share your changes with teammates using temporary preview URLs.
  • GitHub integration for easy iterations during development.

Domain Management

  • Use a Firebase-provided subdomain or register your custom domain.
  • No-cost SSL certificate for security out of the box.


Effective Scalability

  • Backed by Google Cloud infrastructure, Firebase Hosting ensures scalability to meet your users’ needs.

 How Does It Work?


Deploying Files

  1. Using the Firebase CLI, you deploy files from local directories on your computer to Firebase Hosting servers.
  2. Beyond serving static content, you can use Cloud Functions for Firebase or Cloud Run to serve dynamic content and host microservices on your sites.

SSL Connection

  1. All content is served over an SSL connection from the closest edge server on Firebase’s global CDN.

Local Emulation

  1. Use the Firebase Local Emulator Suite to emulate your app and backend resources at a locally hosted URL.
  2. Share changes via temporary preview URLs during development.

Lightweight Configuration Options

  1. Easily rewrite URLs for client-side routing.
  2. Set up custom headers.
  3. Serve localized content.

Get Started with Firebase Hosting


  1. Install the [Firebase CLI] (https://firebase.google.com/docs/cli).
  2. Deploy your app using Firebase deploy
  3. Enjoy fast, secure hosting with automatic SSL
  4. flutter build web /build/web
  5. assets
  6. AssetManifest.json
  7. FontManifest.json
  8. NOTICES
  9. fonts (including MaterialIcons-Regular.ttf)
  10. image files
  11. packages
  12. cupertino_icons assets
  13. CupertinoIcons.ttf
  14. shaders (only present when using CanvasKit renderer)
  15. ink_sparkle.frag (only present when using CanvasKit renderer)
  16. canvaskit.js (only present when using CanvasKit renderer)
  17. canvas kit. wasm (only present when using CanvasKit renderer)
  18. favicon.png
  19. flutter.js
  20. flutter_service_worker.js
  21. index.html
  22. main.dart.js
  23. manifest.json
  24. version.json

Debugging a Flutter web app involves using various tools and techniques. Let’s explore how you can debug your app effectively:

Debugging Tools

1. VS Code and Android Studio/IntelliJ

1 These IDEs support a built-in source-level debugger for Flutter and Dart.
2 You can set breakpoints, step through code, and examine variable values.
3 Make sure your app is in debug mode (use `flutter run -d chrome` to build a debug version).

2. Dev Tools

1 Dev Tools is a suite of performance and profiling tools that run in a browser.
2 It provides insights into your app’s performance, memory usage, and more.
3 Access it by running your app with `flutter run -d chrome` and opening `localhost:8080` in Chrome.

3. Flutter Inspector

1 Available within Dev Tools or directly from Android Studio/IntelliJ (with the Flutter plugin).
2 Allows you to examine the widget tree visually, inspect individual widgets, view property values, and enable performance overlays.

4. Print Debugging

1 Print statements help you understand what’s happening in your code.
2 Use `print()` statements strategically to log relevant information during development.

Building for Release

1.  the App for Release

1 Use `flutter build web` to generate the release version of your app.
2 The output files are placed in the `/build/web` directory of your project.

2. Directory Structure

3. Test Locally

Launch a web server (e.g., `python -m http.server 8000`) and open the `/build/web` directory. Navigate to `localhost:8000` in your browser to view the release version of your app.

Deploying to the Web

When you’re ready to deploy your app

1. Firebase Hosting

1 Install or update the Firebase CLI: `npm install -g firebase-tools`
2 Enable web frameworks preview: `firebase experiments:enable webframeworks`
3 Initialize Firebase: `firebase init hosting`
4 Choose Flutter Web as your web framework.
5 Deploy your app to Firebase Hosting: `firebase deploy`

2. Other Hosting Services

Choose from GitHub Pages, Google Cloud Hosting, or any other cloud service.

Remember that debugging a web app requires Chrome DevTools . Happy debugging!
I’ve provided detailed steps for debugging and deploying your Flutter web app. If you’d like me to rephrase or focus on specific aspects, feel free to ask!

Conclusion

Hosting a Flutter web app is a vital step in making your application accessible to users on the internet. By following the steps outlined in this guide, you can confidently choose a hosting provider, deploy your Flutter web app, and ensure its smooth operation over time. Whether you’re a seasoned developer or just getting started with Flutter, hosting your web app is an essential skill to master in today’s digital landscape. Whether you’re building a personal project, launching a startup, or contributing to a larger enterprise, hosting your Flutter web app effectively is a critical step toward success in the digital realm. So, take the plunge, deploy your Flutter web app, and watch as your creation comes to life on the World Wide Web. Happy hosting!

Categories
flutter app Mobile app

10 Innovative Flutter App Ideas to Inspire Your Next Project

In today’s digital age, mobile applications have become an integral part of our lives, simplifying tasks, and enhancing experiences. Flutter, Google’s UI toolkit for building natively compiled applications for mobile, web, and desktop from a single codebase, has gained significant popularity among developers due to its efficiency and versatility. If you’re looking for inspiration for your next Flutter app project, you’re in the right place. In this blog post, we’ll explore 10 innovative Flutter app ideas that can spark creativity and drive your development journey.


Virtual Interior Designer:

Picture this: You walk into your living room, unsure whether that new sofa you’ve been eyeing will complement the space. But instead of wrestling with the heavy furniture or relying solely on your imagination, imagine whipping out your phone and opening up a virtual interior designer app. With just a few taps, you can upload a photo of your room and start experimenting with different furniture arrangements, paint colors, and decor styles—all in real-time. It’s like having your own personal interior decorator right at your fingertips, guiding you through the design process with ease and confidence.

Thanks to augmented reality integration, you can take it a step further by virtually placing furniture items within your space and seeing how they fit before making any purchasing decisions. No more second-guessing or buyer’s remorse—just the thrill of seeing your vision come to life right before your eyes. Whether you’re redecorating a single room or planning a complete home makeover, this virtual interior designer app built with Flutter makes the process not only effortless but also incredibly fun and interactive.


Fitness Tracker & Virtual Trainer:

With a Flutter-based fitness tracker app, it’s like having a personalized trainer cheering you on every step of the way. No more guessing games or feeling lost at the gym—this app is your go-to guide for creating tailored workout plans, complete with real-time exercise demonstrations to ensure you’re getting the most out of every rep and movement. And with progress tracking features, you can see how far you’ve come and celebrate every milestone along the road to a healthier you.

But it doesn’t stop there. With seamless integration with wearable devices like smartwatches, you can take your fitness tracking to the next level by accessing real-time health data and insights right from your wrist. It’s like having a mini health coach keeping tabs on your every move, motivating you to push harder and reach your goals. Whether you’re a seasoned gym-goer or just starting out on your fitness journey, this Flutter-based fitness tracker app is your ultimate partner in achieving a happier, healthier lifestyle.

Language Learning Companion:

on a journey to learn a new language is like opening a door to a whole new world of opportunities and connections. But let’s face it, it can also be daunting and overwhelming at times. That’s where a Flutter app designed to support language learning steps in to lend a helping hand. Imagine having a friendly companion right in your pocket, guiding you through vocabulary drills, grammar exercises, and immersive language games—all tailored to your unique learning style and preferences. With each lesson, you’re not just memorizing words or conjugating verbs; you’re unlocking the secrets of a new culture and broadening your horizons in ways you never thought possible.

And it doesn’t end there. With the magic of speech recognition technology seamlessly integrated into the app, you can practice your pronunciation and conversation skills with confidence. No need to worry about sounding silly or making mistakes—this app is here to encourage you every step of the way, cheering you on as you conquer new linguistic challenges and make meaningful connections with people from around the globe. So whether you’re dreaming of exploring distant lands or simply want to connect with your bilingual neighbor, let this Flutter language learning companion be your guide on the journey to fluency.


Sustainable Living Assistant:

In a world where environmental consciousness is on the rise, envision having a helpful companion right at your fingertips, guiding you toward a more sustainable lifestyle. Imagine opening a Flutter app designed to support sustainable living and finding a treasure trove of practical tips and eco-friendly product recommendations, all tailored to your unique lifestyle and preferences. From simple changes in daily habits to more significant shifts in consumer choices, this app is here to empower you to make informed decisions and take meaningful action to reduce your carbon footprint and protect our planet for future generations.

But it’s not just about individual actions; it’s about coming together as a community united in our commitment to environmental stewardship. With features like carbon footprint calculators, recycling guides, and community forums, this app fosters a sense of connection and collaboration among users, inspiring us to learn from one another, share our successes and challenges, and work together toward a greener, more sustainable world. So whether you’re a seasoned eco-warrior or just starting out on your journey toward sustainability, let this Flutter sustainable living assistant be your trusted ally in the quest to create a brighter, cleaner future for all.


Virtual Event Platform:

In today’s digital age, where remote work and virtual gatherings have become the norm, imagine having a dynamic platform at your fingertips that brings people together from all corners of the globe. Picture opening a Flutter-based virtual event platform and stepping into a vibrant world of interactive experiences and meaningful connections. Whether you’re attending a conference, hosting a webinar, or organizing a virtual trade show, this platform has everything you need to create memorable and engaging events. From live streaming sessions that transport you right into the heart of the action to virtual networking rooms where you can meet and mingle with like-minded individuals, every aspect is designed to enhance the attendee experience and foster genuine connections in a virtual space.

But it’s not just about the attendees; it’s also about empowering organizers to seamlessly orchestrate and measure the success of their events. With robust analytics tools built into the platform, organizers can gain valuable insights into attendee engagement, track key metrics, and make data-driven decisions to optimize future events. Whether you’re a seasoned event planner or a first-time organizer, this Flutter-based virtual event platform is your trusted partner in creating impactful and memorable experiences that transcend physical boundaries and bring people together in new and exciting ways.


Mental Health Companion:

In a world where stress and anxiety often seem to be constant companions, imagine having a compassionate friend right in your pocket, ready to support you on your journey toward better mental health. Picture opening a Flutter app dedicated to mental wellness and finding a sanctuary filled with resources and tools designed to help you navigate life’s challenges with resilience and strength. From soothing guided meditation sessions that calm your racing thoughts to interactive mood-tracking diaries that help you gain insights into your emotional well-being, this app is like a comforting embrace during times of uncertainty and distress.

But it’s not just about managing struggles alone; it’s about finding connection and community in shared experiences. With features like access to licensed therapists and support communities, this app creates a safe and supportive space where you can reach out for help, share your journey with others, and receive the support you need, wherever you are. Whether you’re facing a moment of overwhelm or simply seeking a listening ear, let this Flutter mental health companion be your trusted ally in the quest for inner peace and emotional well-being.


Travel Planner & Itinerary Manager:

Imagine on a journey to a new destination, filled with excitement and anticipation, but also a hint of nervousness about the logistics of planning the perfect trip. Now, picture opening up a Flutter app that feels like your own personal travel assistant, ready to help you every step of the way. From booking flights and accommodations to discovering hidden gems and must-see attractions, this app becomes your go-to platform for organizing all the intricate details of your adventure. With features like customizable itineraries and budget tracking tools, planning your dream vacation becomes a breeze, allowing you to focus on creating unforgettable memories instead of worrying about the nitty-gritty logistics.

But the magic doesn’t stop there. With offline access to maps and guides, this app ensures that you’re never lost or stranded in unfamiliar territory, empowering you to explore with confidence and discover new destinations off the beaten path. Whether you’re a seasoned globetrotter or a first-time traveler, let this Flutter travel planner and itinerary manager be your trusted companion on the journey to discovering the wonders of the world, one unforgettable adventure at a time.


Personal Finance Assistant:

Imagine navigating the labyrinth of personal finances with a trusted companion by your side, guiding you toward financial freedom and security. Picture opening a Flutter app that feels like your own personal finance assistant, offering a helping hand in managing your money with ease and confidence. From tracking your expenses and setting savings goals to exploring investment opportunities, this app becomes your ally in achieving your financial aspirations. With intuitive features like expense tracking and budgeting tools, staying on top of your finances becomes a breeze, allowing you to make informed decisions that align with your financial objectives.


But it’s not just about numbers and figures; it’s about peace of mind and empowerment. With gentle reminders for upcoming bills and insights into your spending habits, this app helps you develop healthy financial habits and take control of your financial future. Whether you’re saving up for a dream vacation or planning for retirement, let this Flutter personal finance assistant be your trusted partner on the journey to financial well-being and prosperity.


Recipe Sharing & Meal Planning:

Imagine stepping into your kitchen, eager to whip up a delicious meal, but feeling uninspired by the same old recipes. Now, envision opening a Flutter app that feels like a bustling marketplace of culinary creativity, buzzing with excitement and possibilities. This app becomes your virtual kitchen companion, offering a vibrant community-driven platform for discovering and sharing mouthwatering recipes from around the world. From comforting classics to exotic delicacies, there’s something for everyone to explore and enjoy. With features like personalized meal planning and interactive cooking challenges, cooking at home becomes not just a chore, but a delightful adventure filled with discovery and joy.

But the magic doesn’t end there. With the ability to generate shopping lists based on chosen recipes, this app transforms meal planning from a tedious task into a seamless and effortless experience. Whether you’re a seasoned chef or a novice cook, let this Flutter recipe sharing and meal planning app be your trusted sous chef in the kitchen, inspiring you to create delicious meals that nourish both body and soul, one recipe at a time.


Emergency Response & Safety App:

Imagine finding yourself in a sudden emergency situation, feeling overwhelmed and unsure of where to turn for help. Now, envision opening a Flutter app that feels like a reassuring hand guiding you through the chaos. This app becomes your lifeline in times of crisis, offering vital resources and assistance at your fingertips. From emergency contact numbers to step-by-step first aid guides, it equips you with the knowledge and tools you need to navigate through challenging situations with confidence and clarity. With real-time alerts for natural disasters or public safety threats, you’re not alone in facing the unknown – this app keeps you informed and connected to the support you need, when you need it most.

But it’s not just about providing information; it’s about offering a sense of security and peace of mind. With integration with location-based services, this app ensures that help is never far away. Whether you’re seeking emergency services or a safe shelter, it helps you quickly find assistance nearby, turning moments of crisis into opportunities for swift resolution and support. In times of uncertainty, let this Flutter emergency response and safety app be your trusted companion, guiding you through the storm and leading you to safety with compassion and care.

Conclusion:

The possibilities for Flutter app development are limitless, with opportunities to create innovative solutions that cater to diverse needs and interests. Whether you’re passionate about health and fitness, sustainability, education, or travel, there’s a Flutter app idea waiting to be brought to life. By leveraging the power of Flutter’s cross-platform capabilities and intuitive development framework, you can embark on a journey to build impactful and user-centric applications that make a difference in people’s lives. So, what are you waiting for? Let these ideas inspire you to embark on your next Flutter app project and unleash your creativity in the world of mobile app development.


FAQs:


Q: Is Flutter a suitable framework for building complex applications?

A: Yes, Flutter is well-suited for building complex applications thanks to its robust framework, hot reload feature, and extensive library of pre-built widgets. It allows developers to create high-performance, visually appealing apps that run seamlessly across multiple platforms.


Q: Can Flutter apps be easily integrated with other technologies and services?

A: Yes, Flutter apps can be integrated with a wide range of technologies and services, including APIs, databases, cloud services, and third-party SDKs. Flutter’s flexible architecture and support for platform-specific features make it easy to incorporate various functionalities into your app.


Q: How does Flutter compare to other cross-platform frameworks like React Native?

A: While both Flutter and React Native are popular choices for cross-platform app development, they have different approaches and philosophies. Flutter uses a compiled programming language (Dart) and a custom rendering engine, offering high performance and consistent UI across platforms. React Native, on the other hand, uses JavaScript and relies on native components, providing flexibility and access to a larger developer community.


Q: Is Flutter suitable for beginners in mobile app development?

A: Yes, Flutter can be a great choice for beginners in mobile app development due to its simplicity, documentation, and community support. The framework’s intuitive development environment and hot reload feature make it easy for beginners to quickly iterate and see results in real-time.


Q: Are there any limitations to using Flutter for app development?

A: While Flutter offers many advantages, it also has some limitations, such as limited native platform APIs, larger app size compared to native apps, and potential performance issues in very complex applications. However, these limitations can often be mitigated through careful planning, optimization techniques, and leveraging platform-specific features when necessary.

Categories
Mobile app Web

A Designing an App User Interface (UI) for a consistent User Experience (UX)

In today’s digital age, where mobile applications have become an integral part of our daily lives, the importance of a well-designed user interface (UI) cannot be overstated. A seamless user experience (UX) hinges on an intuitive and visually appealing UI that guides users effortlessly through the app’s functionalities. In this comprehensive guide, we’ll explore the principles, best practices, and FAQs surrounding the design of an app UI for a seamless user experience.

Understanding the Importance of UI/UX Design

In this section, we’ll delve into the significance of UI/UX design in the world of mobile applications. We’ll discuss how a well-crafted UI enhances user engagement, improves usability, and fosters brand loyalty. Additionally, we’ll highlight the key differences between UI and UX, emphasizing their complementary roles in delivering an exceptional app experience.

Principles of Effective UI Design

  1. Clarity and Simplicity: We’ll explore the importance of keeping the UI design clean and uncluttered, focusing on clear navigation and intuitive interactions.
  2. Consistency: Maintaining consistency in visual elements such as colors, typography, and iconography contributes to a cohesive and familiar user experience.
  3. Accessibility: We’ll discuss the significance of ensuring the UI is accessible to users of all abilities, including features such as scalable fonts and high color contrast.
  4. Feedback and Response: Providing immediate feedback to user actions through visual cues and responsive elements enhances user engagement and satisfaction.
  5. Hierarchy and Prioritization: Establishing a clear hierarchy of information guides users through the app’s content, prioritizing important features for easy access.

Best Mobile app Practices for Designing a Seamless UX

In this section, we’ll delve into practical tips and best practices for designing a seamless user experience. We’ll cover topics such as user research, prototyping, usability testing, and iterative design. By following these best practices, designers can create UI/UX that resonates with users and delivers tangible value.


mobile applications, the marriage between user interface (UI) and user experience (UX) reigns supreme, dictating the success and satisfaction of users. Exceptional UI/UX designs not only captivate audiences but also ensure smooth navigation and interaction. This exploration unveils some of the finest examples of mobile app UI/UX designs that embody the essence of a flawless user experience.

Headspace:

Headspace, a meditation and mindfulness app, emerges as a beacon of exemplary UI/UX design, offering users a serene and immersive experience. With its calming color palette, intuitive navigation, and clear instructions for guided meditation sessions, Headspace creates an oasis of tranquility for users seeking inner peace and mindfulness. The app’s user-centric design fosters engagement and encourages users to prioritize their mental well-being.

Google Maps:

Google Maps stands as a paragon of comprehensive UI/UX design, providing users with an indispensable tool for navigation and exploration. The app’s intuitive interface, real-time traffic updates, and integrated public transit information make it a go-to resource for travelers and commuters alike. Google Maps’ seamless user experience and rich feature set make it an essential companion for users navigating the world around them.

Airbnb:

Airbnb’s mobile app exemplifies user-centric design, offering travelers a seamless booking experience that transcends traditional hospitality platforms. The app’s intuitive search filters, interactive maps, and visually captivating property listings make it effortless for users to find and book accommodations. Airbnb’s commitment to personalized recommendations and social proof enhances user trust and engagement, making it a standout in the travel industry.

Uber:

Uber’s mobile app sets the standard for user-friendly design in the transportation industry, offering commuters a hassle-free way to navigate their cities. With its minimalist UI, straightforward navigation, and real-time tracking feature, Uber simplifies the process of requesting rides with just a few taps. The app’s clear pricing information and seamless payment process contribute to a frictionless user experience that keeps users coming back for more.

Spotify:

Spotify’s mobile app delivers a harmonious blend of functionality and aesthetics, providing users with a music streaming experience that delights the senses. With its sleek interface, personalized recommendations, and seamless playback controls, Spotify offers users a curated journey through their favorite songs and playlists. The app’s intuitive design and extensive library of music make it a beloved companion for music enthusiasts worldwide.

Best UI/UX websites

the fusion of user interface (UI) and user experience (UX) is pivotal in shaping the success and satisfaction of website visitors. Exceptional UI/UX designs not only captivate audiences but also ensure effortless navigation and interaction. This exploration unveils some of the finest examples of website UI/UX designs that embody the essence of a flawless user experience.

Headspace (Website):

Headspace’s website stands as a shining example of exemplary UI/UX design, offering visitors a serene and immersive journey into the world of meditation and mindfulness. With its soothing color palette, intuitive navigation, and clear messaging, the Headspace website creates a tranquil environment for users to explore its offerings and embark on a journey of self-discovery. The website’s user-centric design fosters engagement and encourages visitors to prioritize their mental well-being.

Google Maps (Web Version):

Google Maps’ web version delivers a seamless navigation experience, providing users with an intuitive interface and comprehensive mapping features. The website’s clean layout, interactive maps, and real-time traffic updates make it a go-to resource for travelers and commuters alike. Google Maps’ user-friendly design and extensive functionality ensure that visitors can easily find their way around and explore new destinations with confidence.

Airbnb (Desktop Experience):

Airbnb’s desktop experience offers users a seamless booking journey, mirroring the app’s user-centric design principles. The website’s intuitive search filters, captivating property listings, and streamlined booking process make it effortless for users to find and book accommodations. Airbnb’s emphasis on personalized recommendations and social proof enhances user trust and engagement, making it a standout in the hospitality industry.

GitHub (Web Interface):

GitHub’s web interface provides developers with a powerful platform for code collaboration and version control, featuring a robust set of features and tools. The website’s streamlined layout, intuitive code repository management, and collaborative workflow capabilities make it indispensable for developers working on projects of all sizes. GitHub’s user-friendly design and comprehensive documentation resources contribute to a vibrant developer community and drive innovation in software development.

Duolingo (Language Learning Platform):

Duolingo’s web platform provides users with an engaging and interactive language learning experience, featuring gamified lessons and adaptive learning algorithms. The website’s colorful design, intuitive lesson structure, and progress-tracking features make language learning enjoyable and accessible to users of all ages and proficiency levels. Duolingo’s user-centric design and emphasis on accessibility and inclusivity contribute to its popularity as a leading language learning platform worldwide.

Conclusion:

In conclusion, designing an app UI for a seamless user experience requires a combination of creativity, empathy, and technical expertise. By adhering to the principles of effective UI design, embracing best practices for UX design, and addressing common FAQs, designers can create compelling UI/UX that delights users and drives engagement. With the ever-evolving landscape of mobile applications, mastering the art of UI/UX design is essential for staying competitive and delivering exceptional app experiences.

Categories
E-commerce shopify Web web 2.0

How to enable private app development Shopify

Shopify offers a plethora of tools and features to customize and enhance your online store. One such feature is private app development, which allows you to create tailored solutions to meet your specific business needs. In this comprehensive guide, we’ll walk you through the process of enabling private app development on Shopify, along with frequently asked questions to help you navigate the intricacies of this powerful platform.

Understanding Private App Development on Shopify

Before diving into the technical aspects, Private app development on Shopify offers merchants the opportunity to create bespoke solutions to their specific business needs. Unlike public apps available in the Shopify App Store, private apps are exclusive to a single Shopify store and are not accessible to other merchants.

These custom-built applications are designed to seamlessly integrate with the existing infrastructure of your Shopify store, enabling you to extend its functionality beyond the capabilities of standard features. Private apps can automate repetitive tasks, such as order processing or inventory management, saving time and reducing the risk of human error.

Moreover, private apps can integrate with third-party services and APIs, allowing you to leverage additional tools and resources to enhance your store’s performance. Whether it’s integrating with a payment gateway, shipping provider, or marketing platform, private apps provide the flexibility to create tailored solutions that align with your business objectives.

Another key advantage of private app development is the ability to maintain full control over the app’s functionality and data access. Since private apps are exclusive to your store, you have complete ownership and oversight, ensuring that sensitive customer data remains secure and compliant with privacy regulations.


Enabling Private App Development

private app development on Shopify is a straightforward process that grants you access to create and manage custom applications to your store’s needs. Here’s a detailed step-by-step guide to help you get started:

  1. Begin by logging in to your Shopify admin dashboard using your credentials.
  2. Once logged in, navigate to the “Apps” section located on the left-hand side of the dashboard.
  3. Within the “Apps” section, locate and click on the option labeled “Manage private apps.” This will take you to the private app management page.
  4. On the private app management page, you’ll find an option to “Enable private app development.” Click on this button to initiate the process.
  5. After clicking the “Enable private app development” button, Shopify will prompt you to review and accept the terms of service for private app development. Take the time to carefully read through these terms and ensure that you understand them fully.
  6. Once you’ve reviewed and agreed to the terms of service, proceed by confirming your acceptance. This action will activate the private app development feature for your store.
  7. With private app development enabled, you gain the ability to create and manage custom applications specifically designed to enhance your store’s functionality and performance.
  8. You can now begin creating private apps by following Shopify’s guidelines and utilizing the provided tools and resources.
  9. As you develop your private apps, make sure to adhere to best practices and guidelines outlined by Shopify to ensure compatibility and security.
  10. With private app development enabled, you have the flexibility to innovate and tailor solutions to meet your store’s unique requirements, ultimately enhancing your overall Shopify experience.

Creating a Private App

you’ve activated private app development, let’s dive into the process of creating your first private app with detailed steps:

  1. Access the “Manage private apps” page: Start by navigating to the “Apps” section in your Shopify admin dashboard. Then, click on “Manage private apps” to access the private app management page.
  2. Initiate app creation: On the “Manage private apps” page, locate and click on the “Create new private app” button. This action will prompt Shopify to begin the process of creating your new private app.
  3. Complete app details: You’ll be presented with a form where you need to fill out various details about your app. This includes providing a name for your app, specifying the email address associated with it, and selecting the permissions required for its functionality.
  4. Review permissions: Take the time to carefully review the permissions that your app will have. Ensure that the selected permissions align with the intended functions of your app and grant it the necessary access to perform its tasks effectively.
  5. Generate credentials: Once you’ve filled out all the required fields and reviewed the permissions, proceed by clicking the “Save” button. This action will generate the credentials for your private app, including the API key and password.
  6. Secure your credentials: It’s crucial to keep your private app credentials secure to prevent unauthorized access. Treat them with the same level of confidentiality as you would your store’s login credentials. These credentials will be used to authenticate your app when making requests to the Shopify API.

FAQ

Can anyone create a private app on Shopify?

No, only the store owner or someone with the appropriate permissions can create private apps on Shopify. This ensures that only authorized individuals can access and modify sensitive store data.

What permissions do I need to grant to my private app?

The permissions required for your private app will depend on its intended functionality. Shopify offers a range of permissions, including read access to orders, products, and customers, as well as write access to fulfill orders, update products, and manage inventory.

Can I monetize my private app on the Shopify App Store?

Private apps are exclusive to your store and cannot be monetized through the Shopify App Store. However, you can offer your app to other Shopify merchants as a custom solution, either for free or through a separate agreement.

Are there any limitations to private app development on Shopify?

While private app development offers considerable flexibility, there are some limitations to be aware of. For example, private apps are subject to API rate limits, which restrict the number of requests your app can make within a given timeframe. Additionally, certain API endpoints may not be accessible to private apps, depending on your Shopify plan.

Conclusion:

Enabling private app development on Shopify unlocks a world of possibilities for customizing and optimizing your online store. By following the steps outlined in this guide and leveraging the power of private apps, you can enhance the functionality of your store, automate tasks, and provide an exceptional shopping experience for your customers. If you have any further questions or need assistance with private app development, don’t hesitate to reach out to the Shopify support team for guidance and support.


Categories
android Mobile app

Social Media Craze and Understanding the Reasons Behind Our Excessive Usage?

In the dynamic landscape of the digital era, one aspect that dominates our daily lives is the pervasive use of social media. From the moment we wake up to the time we go to bed, a significant chunk of our waking hours is spent scrolling through feeds, posting updates, and engaging in the virtual world. The question that looms large is: Why are we using social media so much? This comprehensive exploration will unravel the intricate web of reasons contributing to our collective obsession with social media.

Human Digital Connections

Social media has become the modern town square, fulfilling our innate desire for connection. In an age where physical distances are easily bridged by digital platforms, these platforms act as the center for human interaction. From responding to old friendships to staying updated on distant relatives, social media provides a virtual space where people gather, share stories, and connect with others. The ease of communication and the ability to maintain relationships across geographical boundaries contribute significantly to our reliance on social media.

Validation of Digital Self-Esteem Economy

The quest for likes, comments, and shares: How social media becomes the stage for seeking validation. In the digital world, validation has become a currency, and social media platforms offer a platform for individuals to showcase their lives and achievements. The instant feedback loop, manifested through likes and comments, has a profound impact on self-esteem. The pursuit of validation and acknowledgment becomes a compelling force, propelling individuals to use social media excessively as they seek external affirmation.

The Fear of Missing Out (FOMO)

The real-time narrative: How FOMO drives us to stay constantly connected. FOMO has become synonymous with the social media experience. The fear of missing out on events, updates, or trends propels users to stay continuously connected. The real-time nature of social media platforms serves as a window to the world, and the constant need to be in the loop fuels the habitual use of social media as individuals fear being left behind in the ongoing narrative of their social circles.

Digital Age of Information Consumption

From global news to niche interests: How social media serves as a real-time information hub. Social media is not merely a platform for personal interactions; it has evolved into a vast reservoir of information. The convenience of having all this information in one place makes social media a preferred source for staying informed. The real-time dissemination of news, trends, and updates tailored to individual preferences ensures that users keep coming back for their regular dose of information.

Entertainment and the Endless Scroll

From videos to memes: How social media platforms become multifaceted entertainment hubs. Social media platforms are not just about connecting; they are also about entertaining. The endless scroll provides a quick escape from the monotony of daily life. The addictive nature of the content, be it videos, memes, or interactive posts, keeps users engaged for extended periods, contributing significantly to the overall increase in social media usage.

Digital Sphere of Personal Branding and Networking

Beyond connections: Social media for personal branding and professional networking. In the age of personal branding, social media acts as a powerful tool for individuals to curate and present their online persona. Professionals utilize platforms like LinkedIn for networking and career opportunities, while influencers leverage Instagram and YouTube to build their brands. The potential for personal and professional growth through social media further fuels its extensive use.

Algorithmic Engagement Loop Design

The science behind the scroll: How algorithms keep users hooked. Social media platforms are meticulously designed with algorithms that prioritize content based on user behavior. The more time users spend on the platform, the more data is generated, allowing algorithms to fine-tune content recommendations. This personalized experience creates a feedback loop, keeping users engaged by showing them content tailored to their preferences, contributing to prolonged usage.

Technological Advancements and Accessibility

Smartphones, the internet, and global connectivity: The trifecta powering social media usage. Technological advancements, coupled with increased internet accessibility, have played a pivotal role in the widespread use of social media. With the majority of the global population having smartphones and internet connectivity, social media is literally at our fingertips. The ease of access has removed barriers, making it effortless for users to log in, connect, and engage with content.

Trap of Desire Social Comparison

The darker side: How social comparison can lead to envy and a perpetual quest for perfection. Social media fosters a culture of comparison, with users constantly measuring their lives against the curated content of others. This comparison can lead to feelings of inadequacy, envy, and a desire to project an idealized version of one’s life. While this contributes to heightened social media usage, it also brings about mental and emotional challenges as users grapple with the perceived success of their peers.

Keeping Features and Fresh Trends

From stories to reels: The constant evolution of social media features. Social media platforms are not static; they continuously evolve by introducing new features and trends. The constant innovation keeps users intrigued and eager to explore the latest functionalities. Whether it’s the introduction of stories, reels, or new filters, these features add a layer of novelty, encouraging users to stay engaged and explore the platform’s full potential.

Shaping Influencer Culture in Social Media

From role models to digital influencers: The impact of influencers on user behavior. The rise of social media influencers has significantly influenced the way users engage with these platforms. Individuals look up to influencers for inspiration, trends, and recommendations. The aspirational lifestyles portrayed by influencers create a desire to emulate their experiences, contributing to increased usage as users seek to align themselves with these digital role models. The influencer culture has become a driving force shaping social media habits.

Stress Relief in The Social Media

From stress to solace: How social media serves as a form of escapism. In a world filled with challenges and stressors, social media offers a virtual escape. Users turn to these platforms as a form of stress relief, immersing themselves in entertaining content, memes, and lighthearted interactions. The ability to momentarily detach from the pressures of reality contributes to the habitual use of social media as individuals seek solace and relaxation in the digital realm.

Amplifying Voices of Social Activism and Awareness

Beyond personal interactions: How social media becomes a platform for social activism. Social media has emerged as a powerful tool for social activism and awareness. Users engage in discussions on important issues, share information about social causes, and participate in movements that resonate with them. The platform’s ability to amplify voices and catalyze change fosters a sense of responsibility among users, motivating them to stay active and informed on societal issues.

Conclusion:

Balancing the digital and physical: Cultivating a mindful relationship with social media. As we unravel the myriad reasons behind our collective obsession with social media, it becomes evident that its role extends far beyond a mere platform for connection. Social media has become a multifaceted digital ecosystem, influencing how we perceive ourselves, connect with

Categories
E-commerce shopify Web

Comprehensive Guide to Navigating Shopify App Development Costs

The e-commerce landscape has undergone a seismic shift, and at the forefront of this revolution is Shopify, a platform that empowers businesses to establish and thrive in the digital marketplace. One of the key elements that elevate the functionality of Shopify is the development of custom apps. However, delving into Shopify app development involves careful consideration of costs. In this extensive guide, we will embark on a journey to unravel the intricacies of Shopify app development costs, providing businesses with valuable insights and a roadmap to navigate this critical aspect of their online presence.

Understanding the Basics Anatomy of Shopify App Development

Before diving into the realm of costs, it is crucial to comprehend the fundamental components of Shopify app development. This section will explore the intricate anatomy of the development process, breaking down the essential elements such as app architecture, user interface design, backend development, and integration with Shopify’s API. By establishing a foundational understanding, businesses can approach the cost considerations with clarity.

Costs Factors Influencing Shopify App Development

The cost of Shopify app development is not a one-size-fits-all scenario. Various factors come into play, shaping the overall investment required. In this section, we will dissect the influential factors, offering businesses a comprehensive view of the variables that impact costs. From the complexity of the project to specific features required, businesses will gain insights into the nuanced considerations that contribute to the overall cost structure.

Simple vs. Complex App Development Projects

The complexity of a Shopify app is a pivotal factor in determining development costs. This section will guide businesses in assessing the complexity of their project, distinguishing between simple and complex app development. By understanding where their project falls on this spectrum, businesses can make informed decisions about the level of investment required for their unique app requirements.

Features That Cost Nice-to-Have Functionalities

Not all features are created equal when it comes to Shopify app development. This section will delve into the features that drive costs, differentiating between must-have functionalities and nice-to-have additions. Businesses will gain insights into how prioritizing features can help strike a balance between offering a robust app and managing development costs effectively.

Customize Design to Reflect Your Brand

Beyond mere functionality, the visual appeal and branding of a Shopify app play a crucial role in user engagement. This section will explore the costs associated with customization and design, emphasizing the importance of creating an app that aligns seamlessly with the brand identity. Businesses will gain tips on how to balance visual aesthetics with budget considerations to create a compelling user experience.

Third-Party Functionality Integrations

The seamless integration of third-party services can significantly enhance the functionality of a Shopify app. However, these integrations come with associated costs. This section will delve into popular integrations, their benefits, and considerations for businesses looking to optimize functionality without exceeding budget constraints. By understanding the impact of integrations, businesses can make strategic decisions aligned with their app objectives.

Building Development Approach Scratch vs Using Templates

The approach taken in Shopify app development—building from scratch or utilizing pre-existing templates—can have implications for both time and cost. This section will guide businesses in making informed decisions based on their specific needs, resources, and budget constraints. By understanding the pros and cons of each approach, businesses can align their development strategy with their overall objectives.

Hiring Developers In-House or Outsourcing

The choice between hiring an in-house development team and outsourcing the project is a critical decision that can significantly impact costs. This section will explore the considerations associated with each option, providing insights into the pros and cons. By weighing these factors, businesses can make a strategic decision based on their budget and resource availability.

Testing and Quality Assurance

Beyond the development phase, testing and quality assurance are critical for a Shopify app’s success. This section will explore the significance of testing, quality assurance processes, and the associated costs. Businesses will gain insights into the long-term benefits of investing in a thoroughly tested app, ensuring a flawless user experience that contributes to customer satisfaction and loyalty.

App Maintenance and Updates

The journey doesn’t end with the launch of the app—ongoing maintenance and updates are essential for optimal performance. This section will discuss the long-term costs associated with app maintenance, emphasizing the importance of staying current with updates. By understanding the necessity of continued investment, businesses can plan effectively for the long-term success of their Shopify app.

Benchmarking Average Expenses Costs

Setting realistic expectations is vital for businesses embarking on Shopify app development. This section will delve into industry standards and average expenses, providing businesses with a benchmark to gauge their investment. By understanding these benchmarks, businesses can set budgets effectively and align their expectations with the prevailing standards in the industry.

Cost-Effective Strategies to Maximizing Value

Strategic decision-making is key for businesses aiming to optimize costs in Shopify app development. This section will provide actionable strategies for maximizing value within budget constraints. From prioritizing features to leveraging cost-effective development tools, businesses will gain insights into practical approaches for ensuring a high return on investment while keeping costs manageable.

Conclusion:

Empowering businesses with knowledge is the ultimate goal of this comprehensive guide. Understanding the intricacies of Shopify app development costs is a crucial aspect of embarking on this transformative journey. By comprehensively examining the various factors influencing costs and providing strategic insights, businesses can navigate the Shopify app development landscape with confidence, ensuring a seamless integration of technology to enhance their e-commerce endeavors.